
How To Make Sauerkraut
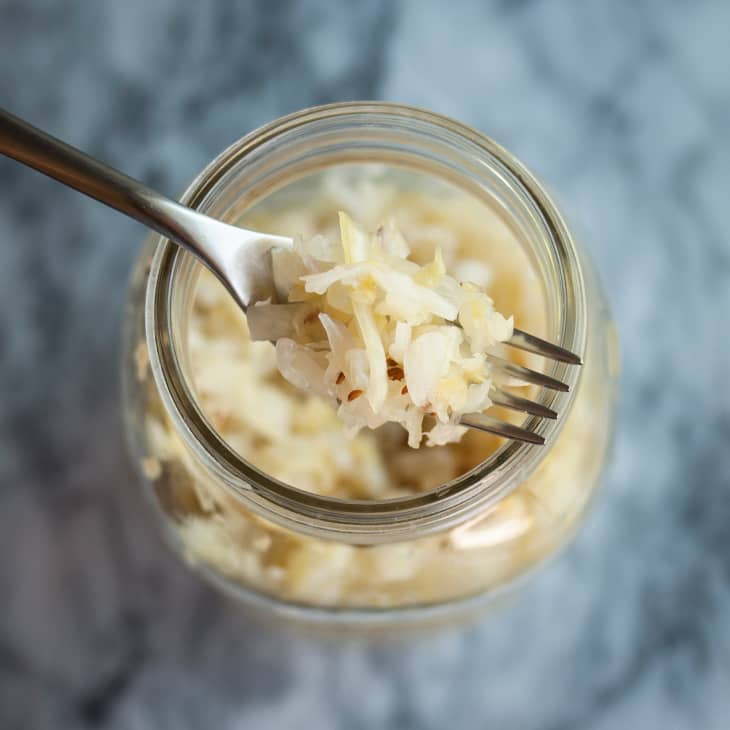
Layer this crunchy, tangy sauerkraut into a big sandwich, or use it top a round of beer-braised brats.
Serves8
Makesabout 1 1/2 quarts
Prep15 minutes
When life gives you cabbage, you make sauerkraut — and homemade sauerkraut is a world apart from the stuff that comes from the grocery store. It’s crunchy and delightfully sour, perfect for topping a round of beer-braised brats or layering into a big sandwich.
If you’re worried about needing a special crock or making so much you’ll be eating it for months, don’t be! Today I’m showing you how to make a small batch of sauerkraut in a mason jar. It’s just enough kraut to get you hooked.
How is Sauerkraut Made?
- Shredded cabbage is mixed with salt, then massaged until softened.
- The cabbage is packed into a jar and weighed down to keep it submerged.
- The cabbage will begin to release liquid, creating its own brine.
- The “good” bacteria on the cabbage will convert sugars into lactic acid, inhibiting the growth of harmful bacteria.
- After 3 to 10 days, the cabbage will be fermented and ready to enjoy.
Making Homemade Sauerkraut is Very Easy
Sauerkraut is often one of the first fermentation projects recommended to curious DIY-ers, and with good reason: It’s beyond easy to make, requires very little special equipment, and the results are dependably delicious.
All you need to do is combine shredded cabbage with some salt and pack it into a container. You can use a crock if you have one and want to make a lot of sauerkraut, but a mason jar will do just fine for small batches.
The cabbage releases liquid, creating its own brining solution. Submerged in this liquid for a period of several days or weeks, the cabbage slowly ferments into the crunchy, sour condiment we know and love as sauerkraut.
How Is Sauerkraut Fermented?
Sauerkraut is made by a process called lacto-fermentation. To put it (fairly) simply: There is beneficial bacteria present on the surface of the cabbage and, in fact, all fruits and vegetables. Lactobacillus is one of those bacteria, which is the same bacteria found in yogurt and many other cultured products.
When submerged in a brine, the bacteria begin to convert sugars in the cabbage into lactic acid; this is a natural preservative that inhibits the growth of harmful bacteria.
Why Should Sauerkraut Be Fermented?
Lacto-fermentation has been used for centuries to preserve seasonal vegetables beyond their standard shelf-life. Here’s why we use it for sauerkraut:
- The fermentation process itself is very reliable and safe.
- Fermented sauerkraut can be kept at cellar temperature (around 55°F) for months, although those of us without cellars can store the kraut in our fridges.
- Besides preserving the cabbage, the fermentation process also transforms it into something incredibly tasty and gives it additional health benefits (fermented sauerkraut contains a lot of the same healthy probiotics as a bowl of yogurt).
What Do I Need to Make Sauerkraut?
At the most basic, all you need is cabbage, salt, and some sort of container to store it while it’s fermenting. It’s important that the cabbage remain submerged in its liquid during fermentation.
When making sauerkraut in a crock, you usually place a weighted plate over the cabbage to pack it down and keep it submerged. When fermenting in a mason jar, inserting a smaller jelly jar filled with rocks or marbles in the mouth of the larger jar serves the same purpose.
The cabbage near the surface tends to float, so when fermenting in a mason jar, you need to either tamp down the cabbage a few times a day or place a large outer leaf of cabbage over the surface of the shredded cabbage to hold it down.
Also be sure to keep the jar covered at all times with a clean cloth or piece of cheese cloth. This will allow airflow, but prevent dust or insects from getting into the sauerkraut.
How Long Does It Take to Make Sauerkraut?
For a small quart-sized batch like we’re making today, the minimum time is about three days, although the kraut will continue to ferment and become tastier for many days after that.
As simple as it sounds, the best rule of thumb is to keep tasting the kraut and refrigerate (or take it cellar temperature) when it tastes good to you. The sauerkraut is safe to eat at every stage of the process, so there is no real minimum or maximum fermentation time.
What Can Go Wrong?
Not much! You may see bubbles, foam, or white scum on the surface of the sauerkraut, but these are all signs of normal, healthy fermentation. The white scum can be skimmed off as you see it or before refrigerating the sauerkraut.
If you get a very active fermentation or if your mason jar is very full, the brine can sometimes bubble up over the top of the jar. This is part of the reason why I recommend using a larger mason jar than is really necessary to hold the cabbage. If you do get a bubble-up, it’s nothing to worry about — just place a plate below the jar to catch the drips and make sure the cabbage continues to be covered by the brine.
It is possible you might find mold growing on the surface of the sauerkraut, but don’t panic! Mold typically forms only when the cabbage isn’t fully submerged or if it’s too hot in your kitchen. The sauerkraut is still fine (it’s still preserved by the lactic acid) — you can scoop off the mold and proceed with fermentation.
This said, it’s still important to use your best judgement when fermenting. If something smells or tastes moldy or unappetizing, trust your senses and toss the batch.
Want to Know More? Check These Resources
I have been making fermented beverages and foods for years, and I have always been amazed by how easy they are and how delicious the results can be. There are a few resources I turn to again and again:
- The Art of Fermentation by Sandor Katz – This is a great all-around resource on fermentation in general, fermentation problem-solving, and fermentation health benefits.
- Cultures for Health – This is an online resource for fermentation cultures and equipment, but I also turn to them for a lot of information on fermenting. They just released a free e-book on lacto-fermentation that is available if you sign up for their newsletter.
How To Make Sauerkraut in a Mason Jar
Layer this crunchy, tangy sauerkraut into a big sandwich, or use it top a round of beer-braised brats.
Prep time 15 minutes
Makes about 1 1/2 quarts
Serves 8
Nutritional Info
Ingredients
- 1
medium head green cabbage (about 3 pounds)
- 1 1/2 tablespoons
kosher salt
- 1 tablespoon
caraway seeds (optional, for flavor)
Equipment
Cutting board
Chef's knife
Mixing bowl
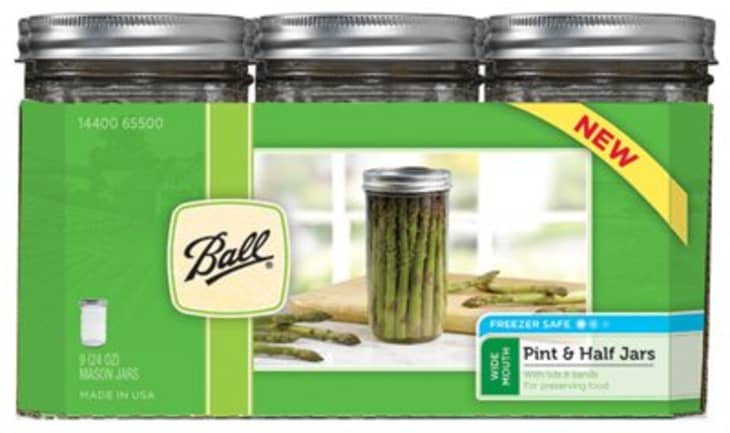
2-quart wide-mouth canning jar (or 2 quart mason jars)
Canning funnel (optional)
Smaller jelly jar that fits inside the larger mason jar
Clean stones, marbles, or other weights for weighing the jelly jar down
Cloth for covering the jar, such as cheesecloth
Rubber band or twine for securing the cloth
Instructions
Clean everything. When fermenting anything, it's best to give the good, beneficial bacteria every chance of succeeding by starting off with as clean an environment as possible. Make sure your mason jar and jelly jar are washed and rinsed of all soap residue. You'll be using your hands to massage the salt into the cabbage, so give those a good wash, too.
Slice the cabbage. Discard the wilted, limp outer leaves of the cabbage. Cut the cabbage into quarters and trim out the core. Slice each quarter down its length, making 8 wedges. Slice each wedge crosswise into very thin ribbons.
Combine the cabbage and salt. Transfer the cabbage to a big bowl and sprinkle the salt over top. Begin working the salt into the cabbage by massaging and squeezing the cabbage with your hands. At first it might not seem like enough salt, but gradually the cabbage will become watery and limp — more like coleslaw than raw cabbage. This will take 5 to 10 minutes. If you'd like to flavor your sauerkraut with caraway seeds, mix them in now.
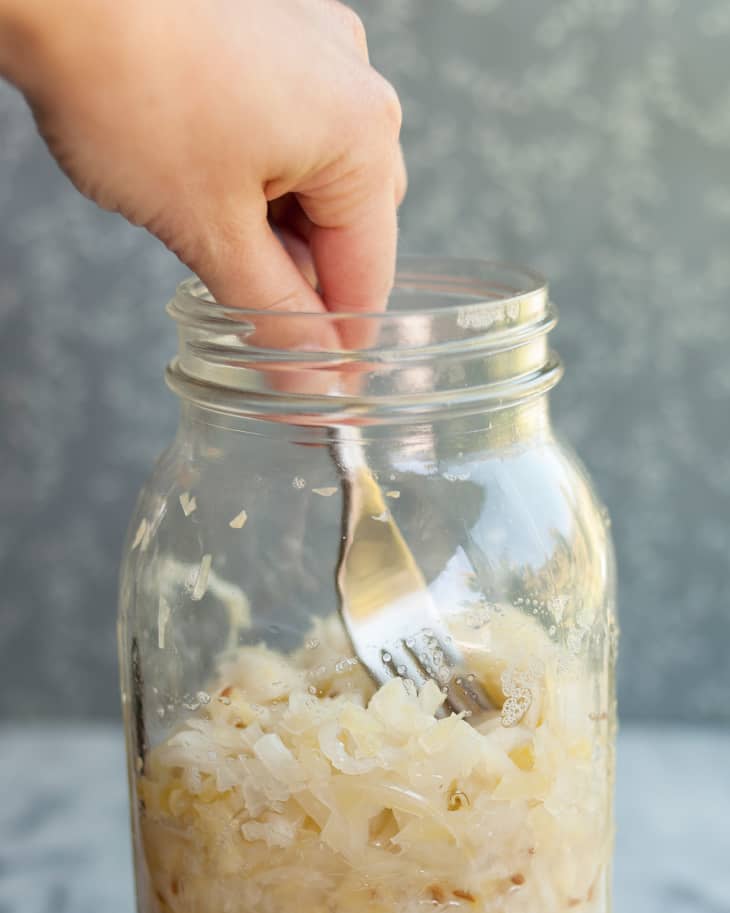
Pack the cabbage into the jar. Grab handfuls of the cabbage and pack them into the canning jar. If you have a canning funnel, this will make the job easier. Every so often, tamp down the cabbage in the jar with your fist. Pour any liquid released by the cabbage while you were massaging it into the jar. Optional: Place one of the larger outer leaves of the cabbage over the surface of the sliced cabbage. This will help keep the cabbage submerged in its liquid.
Weigh the cabbage down. Once all the cabbage is packed into the mason jar, slip the smaller jelly jar into the mouth of the jar and weigh it down with clean stones or marbles. This will help keep the cabbage weighed down, and eventually, submerged beneath its liquid.
Cover the jar. Cover the mouth of the mason jar with a cloth and secure it with a rubber band or twine. This allows air to flow in and out of the jar, but prevents dust or insects from getting into the jar.
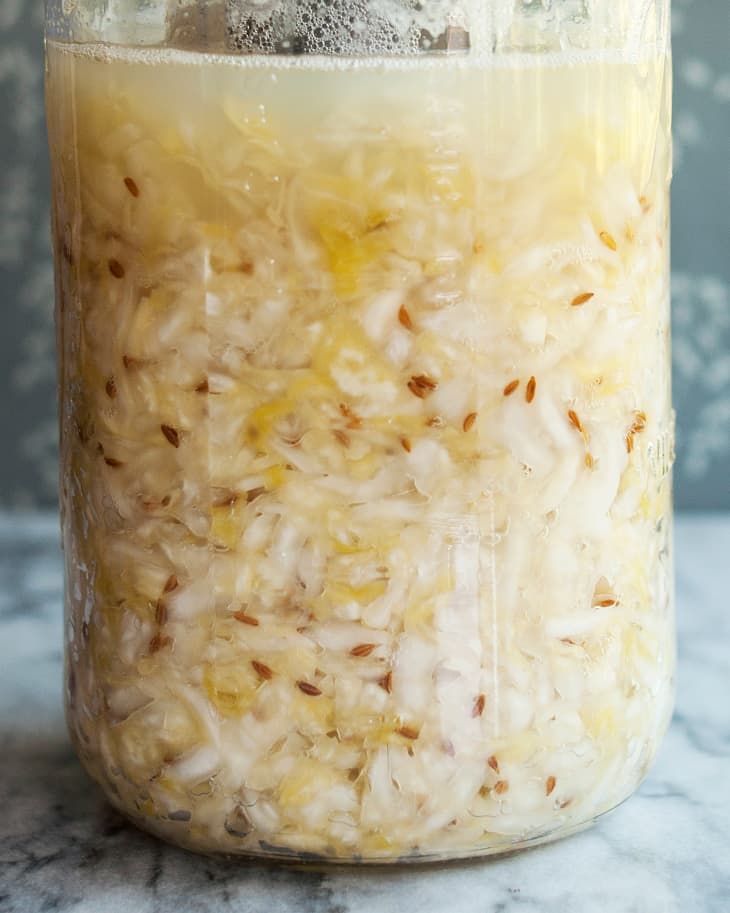
Press the cabbage every few hours. Over the next 24 hours, press down on the cabbage every so often with the jelly jar. As the cabbage releases its liquid, it will become more limp and compact and the liquid will rise over the top of the cabbage.
Add extra liquid, if needed. If after 24 hours, the liquid has not risen above the cabbage, dissolve 1 teaspoon of salt in 1 cup of water and add enough to submerge the cabbage.
Ferment the cabbage for 3 to 10 days. As it's fermenting, keep the sauerkraut away from direct sunlight and at a cool room temperature — ideally 65°F to 75°F. Check it daily and press it down if the cabbage is floating above the liquid.
Because this is a small batch of sauerkraut, it will ferment more quickly than larger batches. Start tasting it after 3 days — when the sauerkraut tastes good to you, remove the weight, screw on the cap, and refrigerate. You can also allow the sauerkraut to continue fermenting for 10 days or even longer. There's no hard-and-fast rule for when the sauerkraut is "done" — go by how it tastes.
While it's fermenting, you may see bubbles coming through the cabbage, foam on the top, or white scum. These are all signs of a healthy, happy fermentation process. The scum can be skimmed off the top either during fermentation or before refrigerating. If you see any mold, skim it off immediately and make sure your cabbage is fully submerged; don't eat moldy parts close to the surface, but the rest of the sauerkraut is fine.
Store sauerkraut for several months. This sauerkraut is a fermented product so it will keep for at least two months and often longer if kept refrigerated. As long as it still tastes and smells good to eat, it will be. If you like, you can transfer the sauerkraut to a smaller container for longer storage.
Recipe Notes
Sauerkraut with other cabbages: Red cabbage, napa cabbage, and other cabbages all make great sauerkraut. Make individual batches or mix them up for a multi-colored sauerkraut!
Canning sauerkraut: You can process sauerkraut for longer storage outside of refrigeration, but the canning process will kill the good bacterias produced by the fermentation process. See this tutorial from the National Center for Home Food Preservation for canning instructions.
Larger or smaller batches: To make larger or smaller batches of sauerkraut, keep the same ratio of cabbage to salt and adjust the size of the container. Smaller batches will ferment more quickly and larger batches will take longer.
Hot and cold temperatures: Do everything you can to store sauerkraut at a cool room temperature. At high temperatures, the sauerkraut can sometimes become unappetizingly mushy or go bad. Low temperatures (above freezing) are fine, but fermentation will proceed more slowly.