
How To Make Caramel Cake

Serves10 to 12
Makes1 (9-inch) layer cake
My heart beats a little faster when I talk about caramel cake. The tender yellow cake, the thick, crystalline frosting that marries caramelized sugar and butter — it’s an easy cake to fall in love with.
The very best caramel cakes are anything but simple; the yellow cake must only carry the whisper of caramel flavor and be both tender and sturdy enough to support the frosting, which is the real star of the show. The frosting on a caramel cake is a true masterpiece — a thick, whipped caramel that will make you close your eyes in pleasure with every bite. If caramel is your weak spot, this recipe will teach you the way, step by caramelized step.
Everything You Need to Know About Caramel Cake
This particular caramel cake is one that I’ve been working on for seven years. With a frosting technique that you might call life changing (if you’re into that kind of hyperbole) it turned a near impossible ideal of a cake into something that can be easily made in a long afternoon. Rockstar bakers, intrepid beginners looking for a project, and lovers of caramel — this is the cake for you. You’re going to need a lot of butter, a lot of sugar, and a little bit of patience for this cake, but every single bite will be worth it!
The most challenging part of making a caramel cake is making the frosting. Guarantee success by having a good candy thermometer and some patience while waiting for the caramel to cook, then cool, and finally thicken.
- You’re baking a pretty standard yellow cake, swapping some of the granulated sugar for brown sugar for a caramel-like sweetness.
- Be sure to cool and level the cakes before making the frosting.
- The frosting requires a little candy-making know-how: First you caramelize some sugar and then you turn the caramel into a crystalline frosting similar to fudge.
The Best Cake for Caramel Cake
“Caramel cake” can be a bit of a misnomer, as the cake itself contains no caramel or caramel flavoring. Traditional caramel cakes call for a boiled milk cake, which is fussy and prone to dryness. I prefer an updated yellow cake which includes brown sugar for more caramel flavor. The yellow cake has more butter, and partnered with the brown sugar, the cake becomes moist with a tighter crumb.
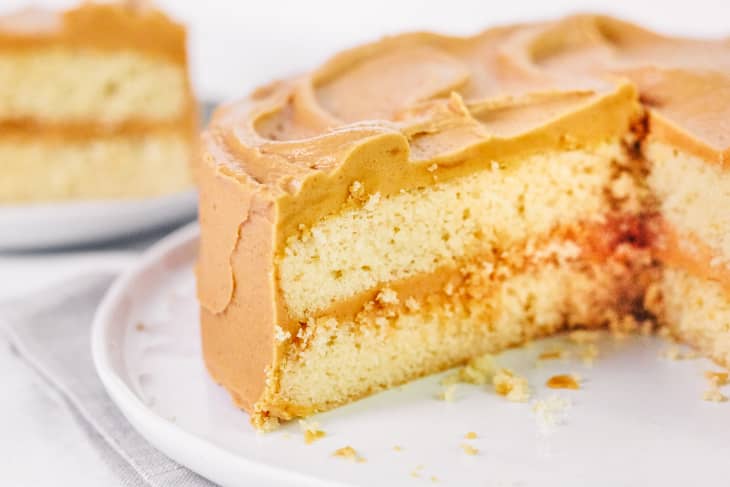
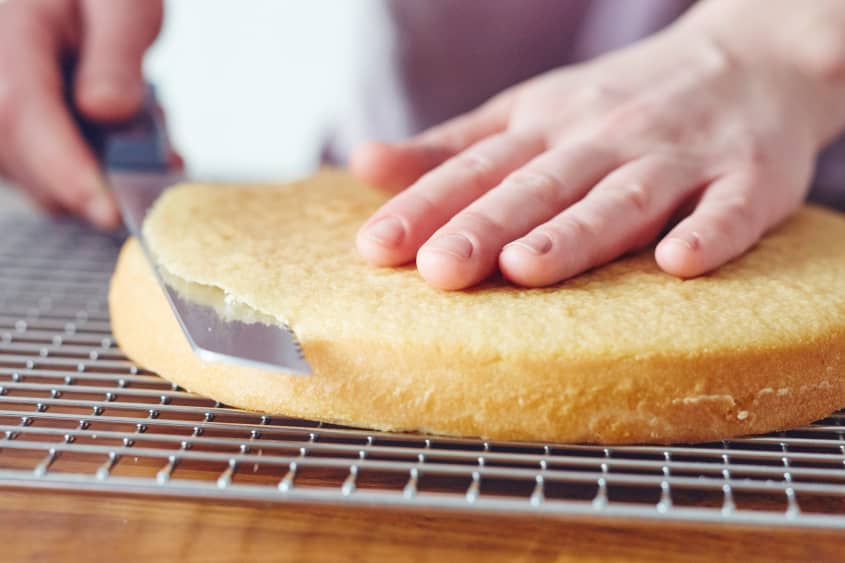
I don’t believe that every cake needs to be leveled (cutting away the raised hump that results from baking), but because caramel cake frosting isn’t the fluffy filling kind of frosting, this cake demands leveling. Once the cakes are cooled, use a long serrated knife to remove the hump of the cake. You’ll expose the inside of the cake, which when sandwiched with the frosting will absorb moisture from the frosting, making the cake taste even more incredible.
Pro tip: You can bake the cakes several days in advance, cool them, and wrap them tightly in plastic wrap. The cakes freeze well for up to three months.
The Best Caramel Frosting
The frosting for caramel cake is unlike any other frosting. There are no eggs or powdered sugar and it is inarguably the challenging part of making the caramel cake. Have all of your ingredients and equipment ready to go, including cake layers that are cooled and leveled, and a cake plate.
Here’s a play-by-play of how you’ll make the frosting.
- Make a dry caramel: Heat some of the sugar for the frosting in a heavy bottomed pan. I love my enameled Dutch oven for this, because the bottom is white and let’s me keep an eye on the caramel easily. Unlike some dry caramels, you can stir the sugar while it cooks. It will go from dry sugar to liquid before beginning to caramelize. Keep your eyes on it and remove it from the heat as soon as it is an even golden-brown.
- Add more sugar, cream, and flour and cook the caramel to 238°F: Right to the pan of caramel you’ll add the remaining sugar, flour, and heavy cream and bring the whole mixture to the soft ball stage, which is typical of fudge and praline candies and why having a candy thermometer is important here. This cooking stage is what will determine the eventual thickness of your frosting.
- Cool the frosting: This is where your patience will be required; the caramel mixture needs to cool from 238°F to about 100°F. This will take about an hour at regular room temperature.
Pro tip: If you are both impatient and brave, you can place the pot of caramel frosting into a shallow ice bath and stir occasionally to cool. This will cut the cooling time in half, but you want to avoid getting any water from the ice bath into the frosting.
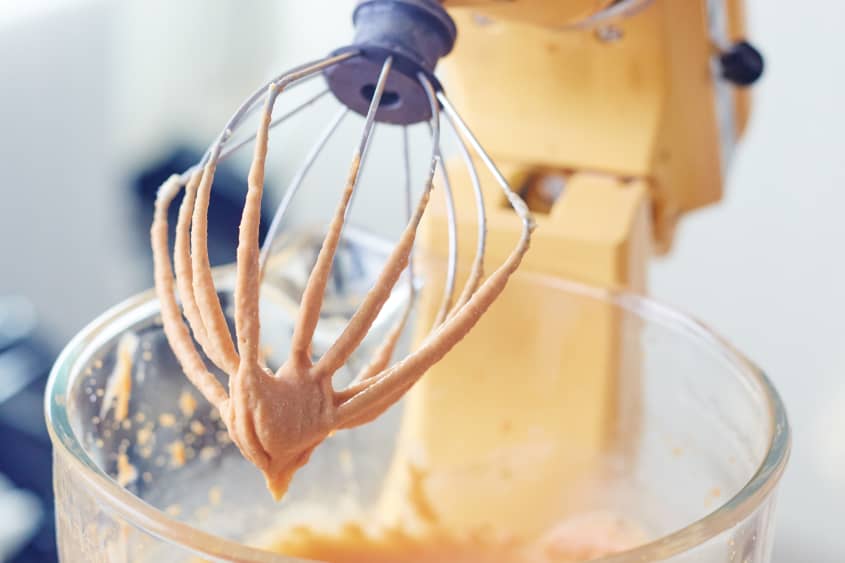
- Finally, beat the frosting: This is when the magic happens. Beat the cooled frosting with a hand mixer to both crystalize and cool it. The frosting will thicken to a spreadable, fudge-like consistency. If you don’t have a hand mixer you can beat the frosting by hand or move it to a stand mixer fitted with the whisk attachment.
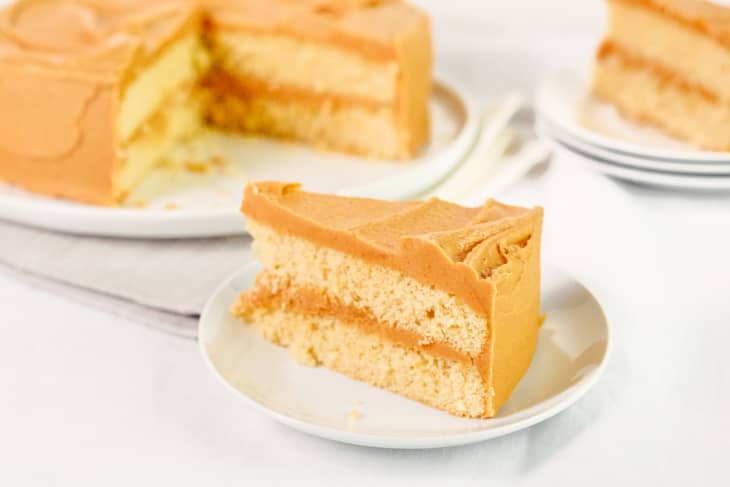
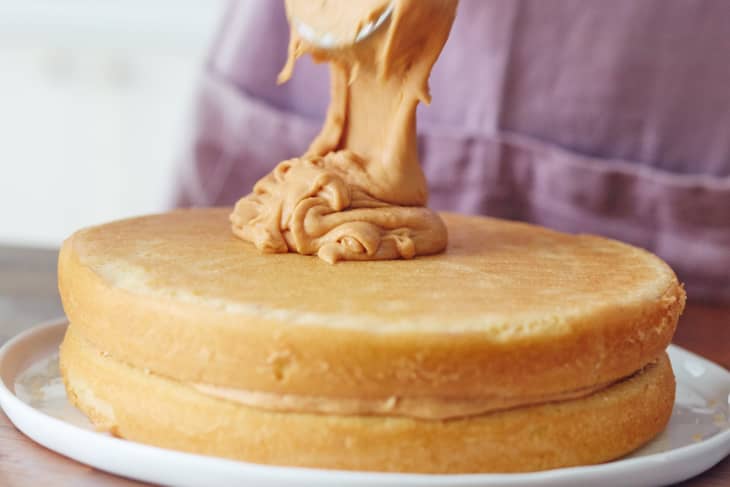
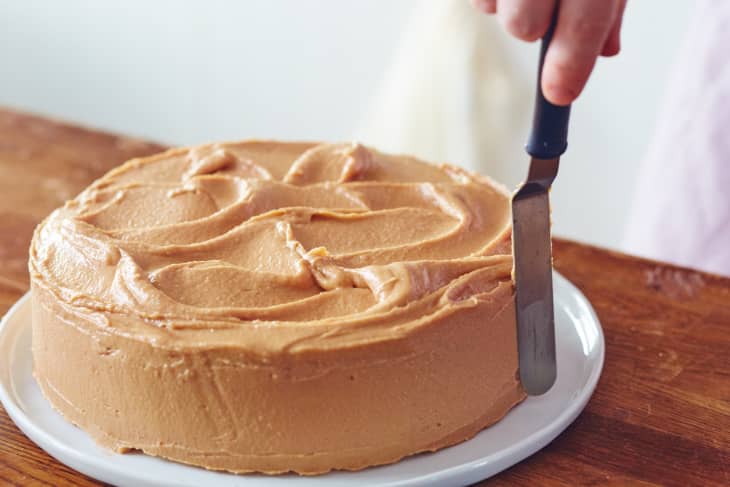
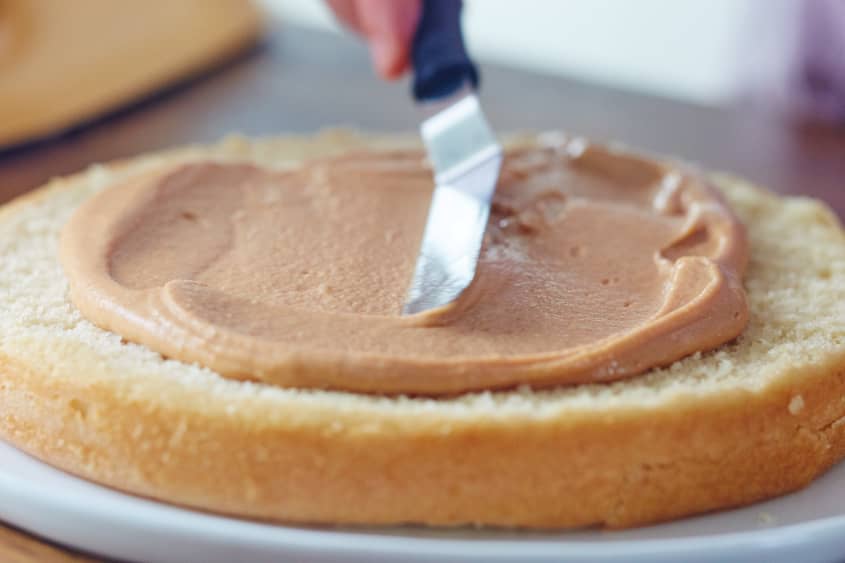
- Frost the cake: While the frosting is still a little warm, frost the cake. Use a little of the frosting to fill the cake and then pour the rest of the frosting onto the top of the cake. Twirl and swirl the frosting down the sides of the cake with intention and add any sprinkles before the frosting cools and sets.
Pro tip: Caramel cake only gets better with age, so if you can stand it, let the cake sit for at least a day before slicing and serving.


How To Make Caramel Cake
Makes 1 (9-inch) layer cake
Serves 10 to 12
Nutritional Info
Ingredients
For the caramel cake layers:
Cooking spray or butter
- 1 stick
(8 tablespoons) unsalted butter, at room temperature
- 1 cup
granulated sugar
- 1/2 cup
packed light brown-sugar
- 3
large eggs
- 2 1/4 cups
all-purpose flour, plus more for dusting
- 3 1/2 teaspoons
baking powder
- 1 teaspoon
salt
- 1 1/4 cups
whole milk
- 1 teaspoon
vanilla extract
For the caramel frosting:
- 2 1/2 plus 1/3 cups
granulated sugar
- 1 tablespoon
all-purpose flour
- 1 cup
heavy cream
- 2 sticks
(8 ounces) unsalted butter, at room temperature, divided
- 1 teaspoon
vanilla extract
Equipment
Measuring cups and spoons
- 2
(9-inch) round cake pans
Parchment paper (optional)
Electric hand or stand mixer
Rubber spatula
4-quart saucepan or Dutch oven
Candy thermometer
Long serrated knife
Offset spatula
Instructions
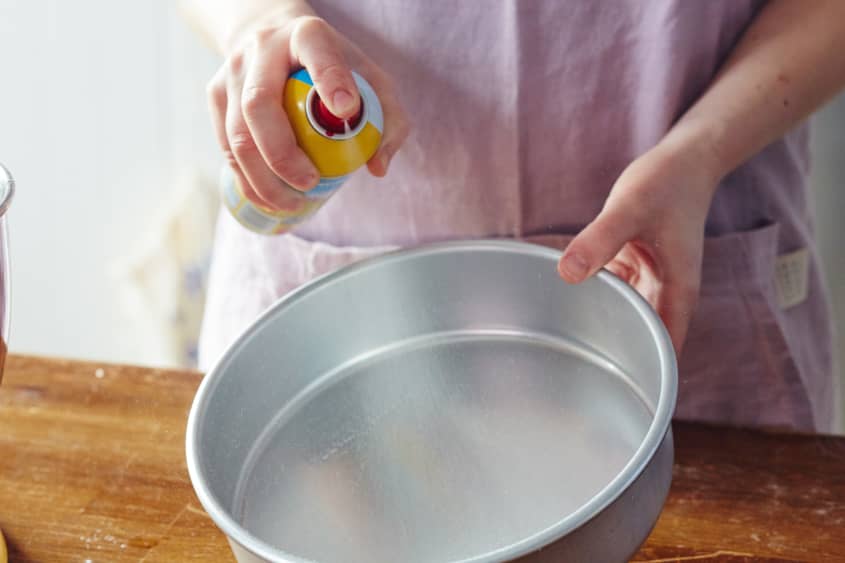
Heat the oven and prepare the cake pans: Arrange a rack in the middle of the oven and heat to 350°F. Coat 2 (9-inch) round cake pans with butter or cooking spray. Sprinkle a little flour into each pan, tilt and shake to distribute evenly, then tap out the excess over the sink. You can also line the bottom of each pan with parchment paper for extra insurance, if you'd like.
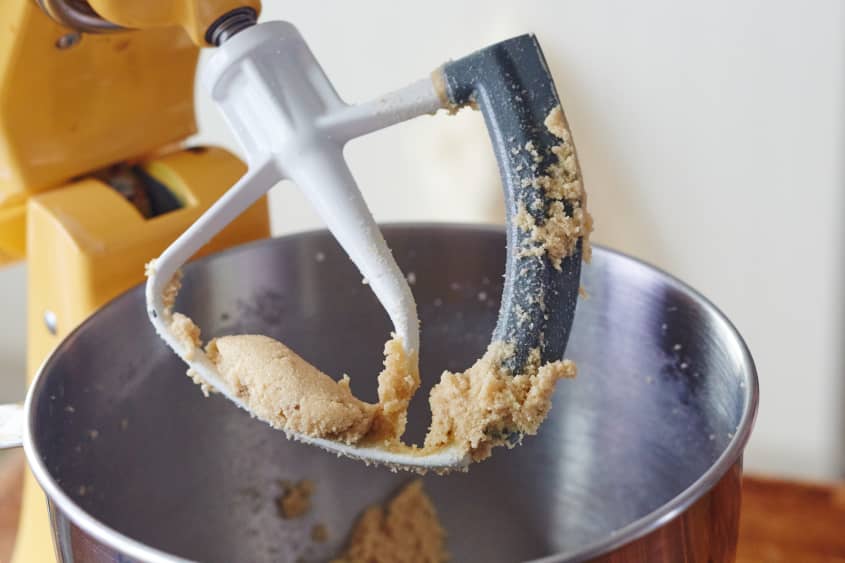
Cream the butter and sugars: Place the butter, granulated sugar, and brown sugar in the bowl of a stand mixer fitted with a paddle attachment. (Alternatively, use an electric hand mixer and large bowl.) Beat on medium-high speed until light and fluffy, about 3 minutes.
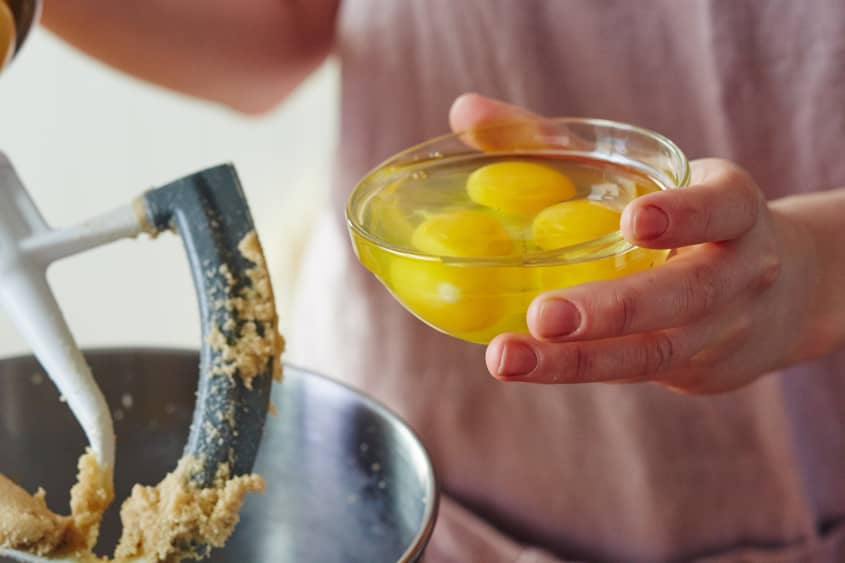
Add the eggs: Add the eggs and beat until fully incorporated and the mixture looks creamy and very pale yellow.
Add the dry ingredients, followed by the milk and vanilla: Beat in the flour, baking powder, and salt on low speed. Add the milk and vanilla and beat on low speed for 30 seconds. Increase the speed to high and beat for 3 minutes. Scrape down the sides of the bowl with a rubber spatula as needed.
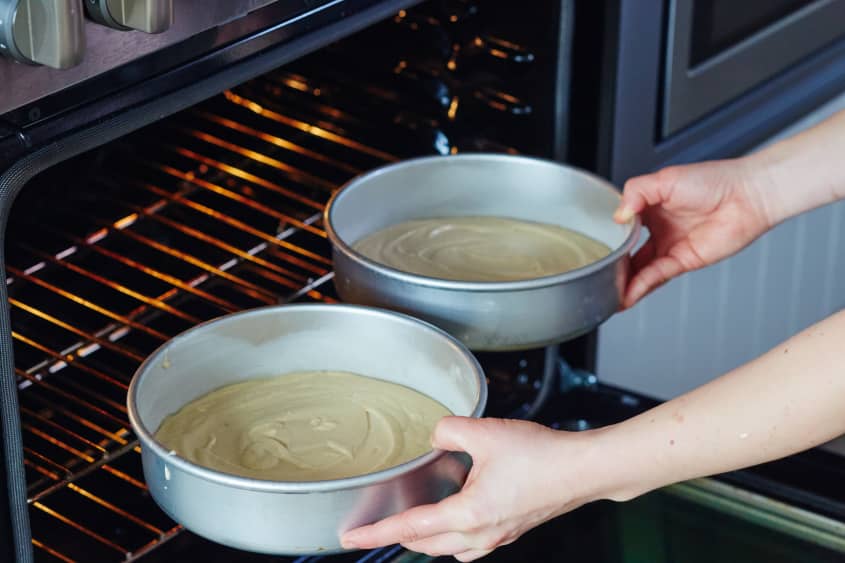
Bake the cakes: Divide the batter between the prepared pans. Bake until the tops spring back slightly when pressed and the cake pulls away from the sides of the pan, 25 to 30 minutes.
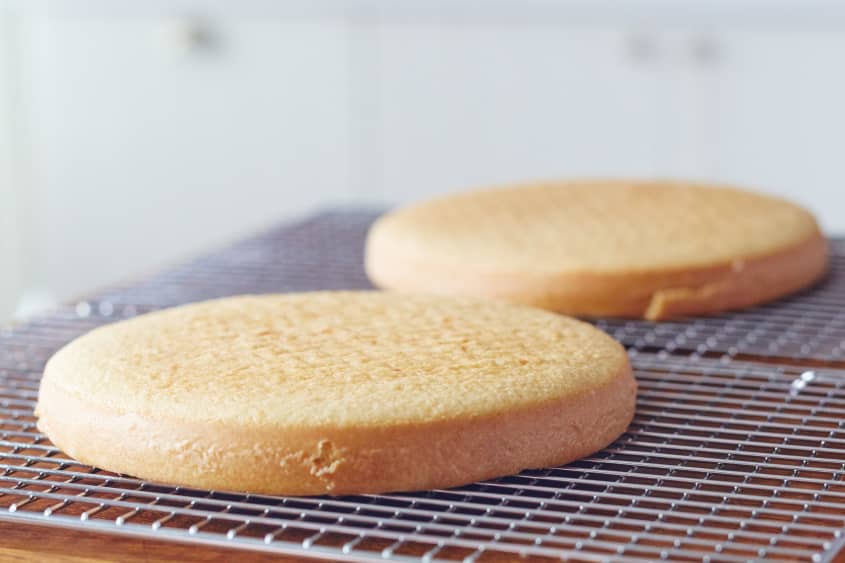
Cool the cakes: Let the pans cool on wire racks for at least 15 minutes. Flip each pan over onto the rack and tap gently all over. Lift the pan slightly. If the cake doesn't feel like it's falling out smoothly, lay a slightly damp kitchen towel over the pan and tap again. If necessary, let the cakes cool more. If they have been baked thoroughly, however, they should fall right out of the pans once they've cooled a little and the sides of the cake have shrunk back from the pan. Cool completely before frosting, about 1 hour. Meanwhile, make the frosting.
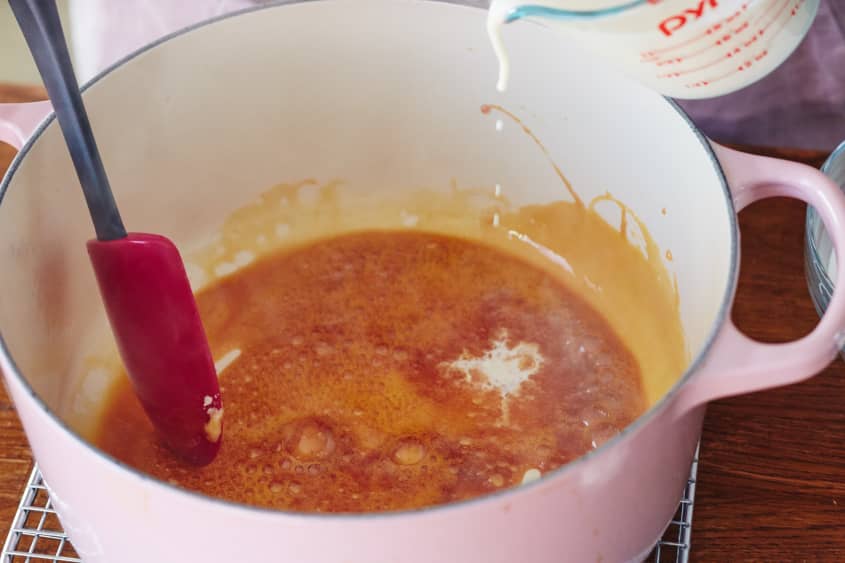
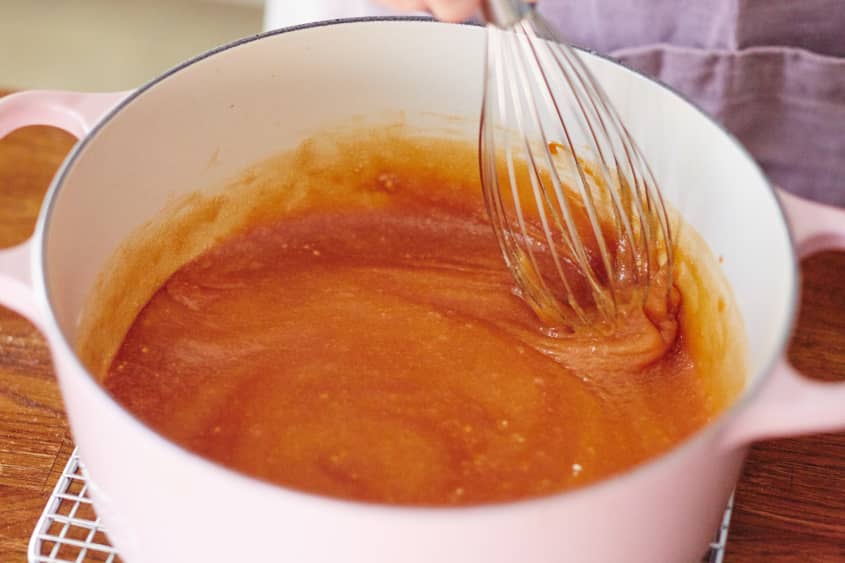
Cook the dry caramel for the frosting: Place 1/3 cup of the sugar in a wide, deep, heavy-bottomed pot or preferably an enameled Dutch oven. Cook over medium-high heat, stirring constantly, until the sugar turns to a golden-brown liquid. The sugar will clump at first, but continue to stir and it will eventually melt and begin to brown. Remove from the heat.
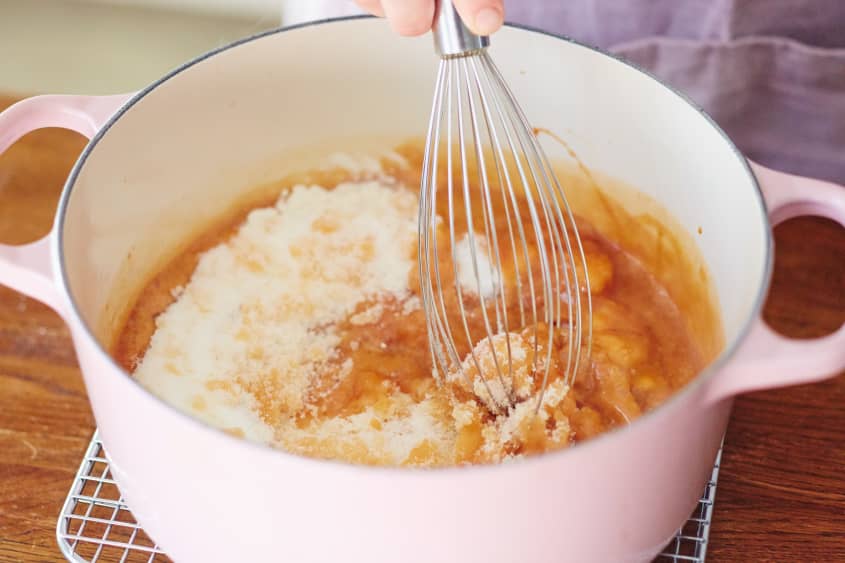
Add the remaining sugar, flour, and cream: Add the remaining 2 1/2 cups sugar, flour, and cream. Whisk until smooth.
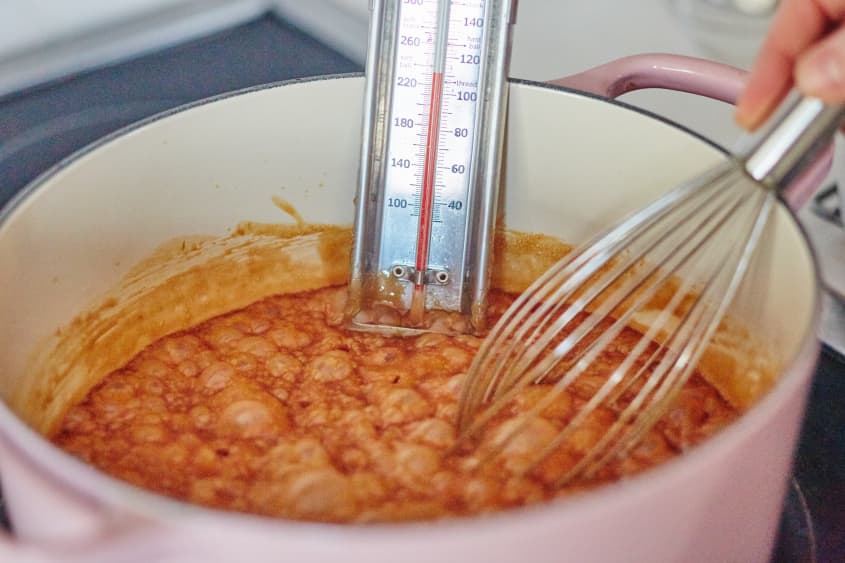
Bring to a soft ball stage: Return the pan to medium-high heat and clip on a candy thermometer. Cook, stirring occasionally, until the mixture reaches 238˚F on a candy thermometer, about 12 minutes. Remove from the heat.
Cool the mixture: Stir in 1 stick of the butter and vanilla. Cool, stirring occasionally, until the mixture is 110°F or cooler, about 1 hour. If you're in a hurry, fill a clean sink halfway with cold water and ice. Set the pot in the sink and stir, being careful to avoid any water getting into the pan, until the mixture is the right temperature.
Level the cakes: While the frosting mixture is cooling, level the cakes. Because this icing isn't fluffy like traditional buttercream (which helps fill and level the cake layers), you want to make sure the tops of both caramel cake layers are nice and flat. Use a long serrated knife to remove a thin, even layer from the top of each cake to remove any hump that occurs during baking.
Beat the cooled caramel and add the remaining butter: Use an electric hand mixer (or transfer to a stand mixer fitted with the whisk attachment) to beat the cooled caramel mixture in the pan on high speed for 10 minutes. The mixture should crystallize, lighten in color, and begin to thicken. Add the remaining 1 stick of butter and continue to beat on high speed until the butter is completely incorporated and the icing is a thick, spreadable paste, about another 5 minutes.
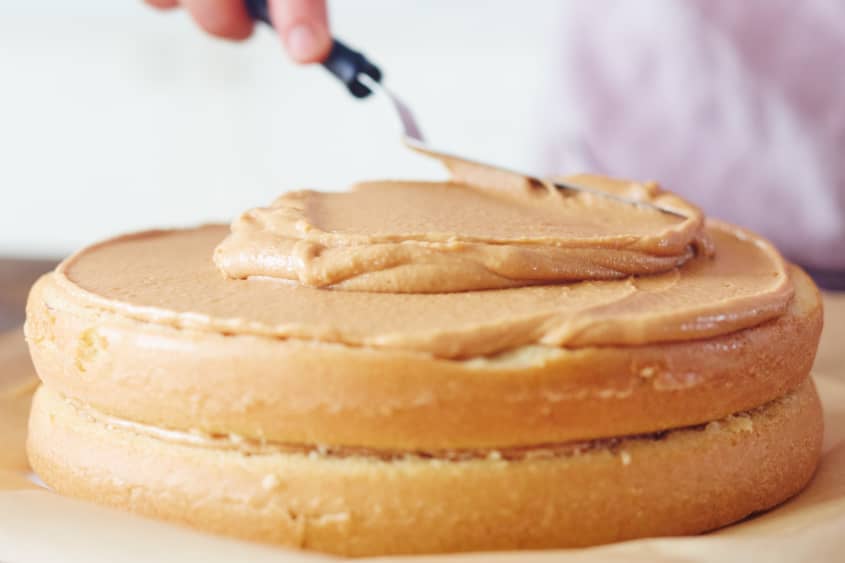
Fill and layer the cake: Set 1 cake layer on a cake plate. Pour 3/4 cup of the frosting onto the cake layer and use an offset spatula to spread it out to the edges of the cake. Invert the other cake layer onto the frosting and make sure the layers match up at their edges.
Ice the cake: Pour the remaining frosting on top of the cake. Use the offset spatula to spread the frosting off the top of the cake and onto the sides. Work quickly, as the frosting will begin to set as it cools. Dipping the spatula in warm water will help prevent sticking as you spread the frosting. Decorate and add sprinkles before the icing sets.
Cool and serve the cake: Once the cake is completely frosted, cool for at least 2 hours before slicing serving. This cake is even better the day after it is made.
Recipe Notes
Make ahead: The cake layers can be baked and wrapped in plastic several days in advance. Store at room temperature.
Storage: Store the cake covered at room temperature for up to 5 days.